
How to Photograph the Ocean View Hotel in GTA VI, From the First Scout to the Final Night Shot

Stand across the road from the Ocean View Hotel in Vice City and try to take a picture of the name. Then take another picture in which someone who has never played GTA VI could tell what kind of evening it is on that street. Those are quite different assignments. The first rewards getting the letters large and clear. The second might lead you halfway down the block, looking back at the hotel over the roof of a passing car. This guide takes the second assignment seriously. Your finished picture will show the Ocean View, one piece of life at street level, and enough of the surrounding block for the two to belong together. You can do the whole shoot with an ordinary gameplay screenshot. On PS5, hold Create to take a screenshot with the standard button assignment. On an Xbox controller with the standard Share layout, press Share once. Take a test frame before you begin so the capture is second nature when a pedestrian steps into place.
Rockstar describes Ocean Beach through its pale sand and pastel Art Deco hotels. Those colors make a pleasant first impression, but they pose a practical problem for a photographer. Give every attractive building equal space and the eye wanders along the strip without settling on any of them. Get tight around a sign and you lose the very street you came to photograph. The following ten stages solve that problem in the order you will encounter it. Start when you can freely explore the beachfront in your game. The examples involving pedestrians, cars, changing light, and reflections are opportunities to look for on your visit. An empty, dry street can produce the finished picture just as readily as a busy evening.
1. Find the hotel and decide what belongs in the picture
Start on Shore Drive in Vice Beach. Follow the hotel frontage on foot and look up for the neon Ocean View name. The open-air bar at ground level gives you a second point of recognition once you reach the building. Take one plainly descriptive screenshot from a place where you can see the sign and the ground floor together. Give the building plenty of space on both sides. This is the picture you will consult when you have forgotten what sits beside the entrance or which end of the block gave you the clearer view. Before you move on, look at the pavement under the sign. A hotel can be identified from its upper floors, while the idea of arriving at one usually lives lower down, where somebody crosses a curb, steps under cover, or passes a lit doorway. Decide which of those two parts of the building matters more to the picture you want. A good brief for a first attempt is “a person passing the Ocean View just as its lights begin to stand out.” It gives you a building, a scale, and a moment worth waiting for.
Read the frontage from pavement to roof
Start at the bottom of your reference picture and move your eyes upward as if you were arriving on foot. Where would you first realize the building ahead was a hotel? A name high above the pavement may be the most obvious answer in a screenshot. Down by the curb, however, the change from open sky to an overhang or from a bright sidewalk to a shaded entrance can do more to suggest arrival. Pick one feature at each height that you can recognize from a distance. For example, you might choose the line where the pavement meets the road, the entrance recess, and the letters overhead. Now cover the upper half of the picture with your hand. See how much of the setting survives. Cover the lower half and ask the same question. The portion you miss most tells you what deserves space when a vehicle or your own character forces a compromise later.
Give the shoot a one-sentence brief
Make the brief concrete enough to settle a disagreement between two pictures. “Vice City looks great at night” could describe a hundred blocks. “A late arrival has the pavement to themselves beneath the Ocean View sign” gives you a reason to keep an empty stretch of sidewalk, wait for one pedestrian, and let a crowd walk away. If people keep gathering outside the hotel, try “the Ocean View is the one still thing on a busy block.” That version makes several figures welcome and suggests holding a level, steady frame. Use whichever sentence fits what you actually find in the game. Write it beside your reference or say it aloud once. When you are tempted to abandon a good angle because a brighter car has appeared behind you, ask whether the car improves that sentence. Sometimes it will. Following it down the street, however, changes the subject and costs you the viewpoint you came to learn.
2. Scout three positions while you can still read the building
Give yourself one straightforward view, one diagonal view, and one close view. For the first, stand across the street and face the portion of the hotel you intend to photograph. For the second, walk along your side of the road until you can see the frontage running away from you. For the third, approach from the hotel's own side and look along the pavement toward the entrance. Save a frame from each position with roughly the same amount of time spent adjusting it. These three pictures answer different questions. Across the road you find out how the building is put together. From the diagonal you discover whether neighboring façades help lead the eye toward it. Up close you see what it would feel like to arrive on foot. Broad daylight or early evening makes the comparison easier because dark windows, shaded openings, and the actual gaps between buildings are still distinguishable. Later, those shapes can merge into one large dark area.
Look behind you before leaving a promising spot
On each stop, turn around and identify something you could use to find the spot again. Choose a fixed seam in the pavement, the edge of a shopfront, or a corner where two permanent surfaces meet. A parked car makes a poor marker, however memorable its paintwork. Then return to the hotel view and note where one near object overlaps a distant one. Perhaps the edge of a post touches the first letter in the name, or the top of a curb lines up with the base of the entrance. That overlap records your position more accurately than “somewhere across from the hotel.” Two steps sideways can separate the objects, even if you keep the building at the same size by adjusting the camera. When the light changes, the combination of a ground marker and an overlap will get you back surprisingly close to the framing you liked. It also gives you a controlled starting point for any further move.
Choose the position that survives an interruption
A clean scout frame can be misleading on a lively street. Stay put for a moment and watch what passes between you and the hotel. From across the road, a tall vehicle may temporarily erase the entire ground floor. Up close on the hotel side, a single pedestrian near the camera may fill more of the picture than three people on the far pavement. At the diagonal, adjacent buildings may swallow the hotel sign as soon as you lower the camera enough to include the curb. Decide which interruption you can work with. If your brief involves a solitary arrival, the near-side position might give you the clearest view of feet crossing the threshold. If it involves the life of the whole block, an occasional passing car is an acceptable price for seeing more street. Keep the two other scout frames. When the chosen angle starts giving you trouble, those pictures tell you what a move would buy and what it would cost.

3. Set the edges of the frame before worrying about its center
From your chosen position, look around the outside of the screen in a slow circuit. Start at the top left, follow the roofline across, inspect the right edge down to the road, then come back along the bottom and up the left side. The hotel is easy to pay attention to because you went there to photograph it. A bright sliver of a neighboring sign is easier to overlook, yet it can take the first glance from the Ocean View when somebody sees the finished image. Give each conspicuous thing at the edges one of two jobs. It can tell the viewer where the hotel sits, or it can point inward toward something important. A strip of neighboring architecture may establish how tightly the buildings share the block. A pale curb might carry the eye toward the entrance. A bright triangle of sky trapped between a pole and the upper corner rarely earns the space it takes.
Decide how much road an arriving person needs
Try three versions from the same spot. In the first, leave just enough pavement to see the feet of anyone standing outside the entrance. In the second, include the curb and part of the nearest traffic lane. In the third, bring in enough of the road to make its surface a large foreground shape. Compare them at a size small enough that you cannot read individual letters. The first version may feel as though you are already outside the door. The second gives a viewer somewhere to stand and a short distance to imagine crossing. The third makes the street itself a subject, especially if a diagonal edge runs across it. An expanse of gray at the bottom becomes expensive if nothing ever enters it and its shape leads nowhere. Equally, a picture cut just below the doorway can make a person look stranded on the bottom edge. The amount of road to keep depends on what you expect the viewer to do with it.
Resolve small collisions while you can still move
Look for two unrelated edges that almost touch. A roof ornament just grazing the top of the frame reads like a cropping accident. A sign ending exactly against a pole can appear to hang from it. A person's head aligned with the bottom of a bright letter makes both shapes harder to recognize. The quickest repair is usually a small sideways move. Watch the near object while you take a pace and see which way it slides against the far one. If you solve the collision but lose the hotel name behind another obstruction, return to your ground marker and try the opposite direction. Only after you have explored that movement should you widen the entire composition. Widening gives everything room at once, including the things you were trying to exclude. Save the corrected version and examine its four corners again. You want enough breathing room to survive the arrival of a moving subject without making a wholesale adjustment in the instant it appears.
4. Use the building's lines to give the viewer a way in
Take the diagonal scout frame and trace the first long line you notice. The curb might lead from the lower corner to a point beyond the hotel. A run of windows might pull you from the hotel toward a much brighter building farther down the strip. Long lines suggest a direction whether or not it suits your subject. For a picture of the Ocean View, find a place where one of those lines arrives close to something the viewer can recognize, such as the door or the name. You can change that relationship by walking a little way along the block. Watch the far end of the curb appear to swing relative to the entrance. Stop when the line gives the eye a reason to pause at the hotel. A strong diagonal ending at a rubbish bin in the corner has probably done an excellent job of introducing the bin. A gentler line ending at the hotel door serves this assignment better.
Square up a front view or commit to the diagonal
If you choose a straight-on view, use a central architectural feature to place yourself. Face the middle of a doorway or align yourself with a repeated row of windows. Look at equivalent features on either side. If one side shows considerably more of the depth of its window recesses, your position is off to that side. Walk toward the center until the difference suits you. This gives a formal front view some visual calm, especially when people are passing through the lower part of the picture. For a diagonal, take the opposite approach and move far enough along the pavement that you can clearly see distance opening between repeated features. A barely angled view can look like a front view taken in a hurry. A stronger angle makes an argument for itself. The lettering may become harder to read as you move, so check the hotel name at the size you expect readers to see it before committing to the angle.
Control the tilt by changing distance
Suppose you are close enough to see an entrance clearly, but including the top of the building means pointing sharply upward. The vertical edges may appear to lean toward one another. That can make a fine picture of looking up from the street. It can also make the doorway and a small figure underneath feel incidental. If you want a quieter outline, walk back while keeping the entrance near the same part of the frame, then bring the camera closer to level. See whether the roof and door now fit with less tilt. You may have added a traffic lane or an unwanted object in the process. Compare that price with the look of the closer frame. Another solution is to let the roof go entirely and crop deliberately through a broad section of wall, clear of the sign. A fragment of the hotel can look complete when its lines reach the picture edges cleanly. Keep the image in which the geometry supports the experience of standing there.
5. Find the moment when the sign and the façade both hold detail
Return to the viewpoint you marked and take a frame while the façade is still easy to read. Use that picture as a record of three small details, perhaps a boundary between two paint colors, the separation between letters in the name, and the edge of the entrance shadow. As the light changes in your game, watch what happens to each one. The period worth shooting begins when the sign catches your attention and the surrounding wall still has some color of its own. There is no universal clock time for this exercise. A face of the building that already sits in shade behaves differently from one catching the last light. Your screen also affects which dark tones you can distinguish. The useful signal is visible in the picture itself. Look away from the screen for a moment, glance back, and see whether you first notice the lettering and can then follow the wall down to the people-sized part of the scene.
Compare light using a patch that stays still
Pick a piece of wall a short distance from the lettering. Watch the same patch through several captures from the same position. A wall immediately beside a luminous feature may pick up its color, so choose a second patch farther along the building as well. Comparing those two patches tells you whether the apparent change belongs to the evening as a whole or to something passing the entrance. Headlights can produce a lovely wash of light that disappears a second later. If you mistake that wash for a lasting change, you can spend much of the session waiting for a picture the sky was never responsible for. Let the street clear and look again. When you like a passing effect, save it on its own merits. Then make an empty-street exposure from the same spot. You will have one photograph about a particular moment of traffic and another that describes the hotel's appearance in the prevailing light.
Keep an earlier and a later version
Make at least one capture before the sign appears bright enough and one after you think the best color has gone. Your eye grows accustomed to the current view, which makes it difficult to remember just how much blue or pink was visible earlier. Compare the pictures side by side later and the choice becomes more interesting than simply voting for the brightest neon. Early light might keep a row of windows visible behind a figure, giving the person a believable destination. Late light might turn that same row into an anonymous dark band while drawing a clean outline around the hotel's name. Both can work. For the assignment about somebody arriving, look especially at the distance between the bright sign and the ground beneath it. If your eye has to cross a featureless black gap to reach the person, try an earlier capture. If a jumble of window detail overwhelms the person, try a later one. Light becomes a way to organize the picture without moving a single object.
6. Place one pedestrian where their outline can tell a story
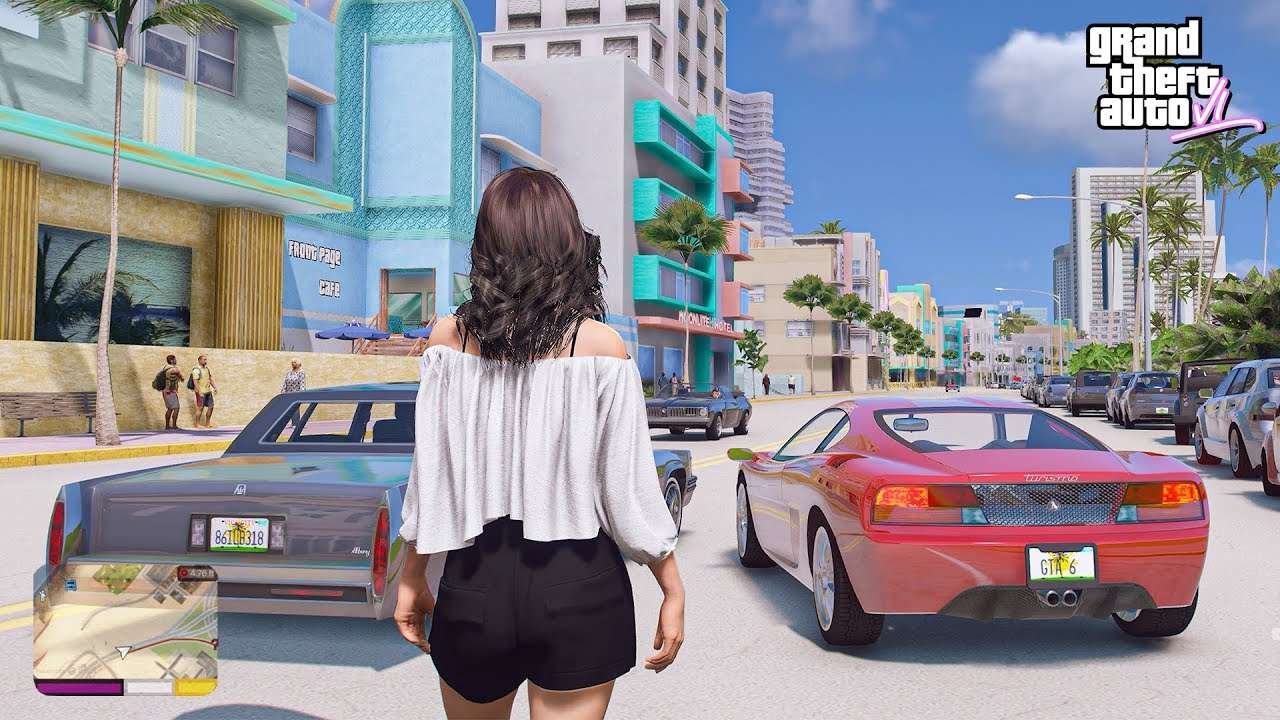
Watch a full passage across your frame before you try to capture anyone. Follow a figure entering from one side, passing the sign, and leaving on the other. Notice where you can distinguish the head, shoulders, and stride most clearly. A pedestrian in dark clothes may appear crisply against a pale wall, disappear in front of a shaded doorway, and reappear under a lamp a few steps later. The attractive entrance you chose as the center of the composition may therefore be the hardest place to see a person. Shift your intended instant slightly earlier or later along their path. The viewer can infer a destination when someone is still a few steps away from it. A figure already buried in a doorway gives much less evidence of where they are going. Choose a narrow interval along the pavement where the body reads as a person at a glance and the hotel still makes sense behind them.
Wait for separation around the head and feet
On the next pass, pay attention to the outlines that do the most storytelling. A head makes it easy to spot a person, while the placement of the feet can distinguish a purposeful stride from somebody standing still. At small sizes, two legs overlapping can make a walking figure look like a bollard. Try saving a sequence of individual frames as someone passes your chosen patch, leaving time between captures for the pose to change. Compare the instant when the legs cross with the instant when one foot reaches forward. Also look above the person's shoulders. The face may be much too small to read, yet a head turned toward the hotel can give the picture direction. If the head happens to overlap a dot of neon, wait for the figure to take a step clear of it. This costs less than following them with the camera and losing the architectural alignment you established in the first place.
Give a solitary figure somewhere to go
Imagine a walker traveling across the frame toward the right. A strip of open pavement on the right helps the viewer anticipate that movement. A doorway in that space makes the movement more specific. Letting the walker reach the extreme right edge can suggest departure, particularly if a long empty stretch lies behind them. Choose the timing according to your brief. For an arrival, try the moment when the person has just entered the open space before the hotel. For the end of an evening, let them walk beyond the entrance before capturing the frame. Those two moments might be a second apart and imply entirely different stories. If two people walk through together, look for a sliver of background between their heads, or a shared gesture that makes them read as a pair. And if your section of pavement stays empty, keep the frame you composed. An illuminated door with room for somebody to arrive can convey anticipation without an obliging pedestrian.
7. Time a passing vehicle without losing the hotel behind it
Decide in advance what part of the building a vehicle may cover. The lower wall is often expendable. The whole entrance matters more in a picture about arriving, and the hotel name matters more in a picture about place. Watch the first vehicle pass and note the highest point its roof reaches against the building. That observation tells you more than the apparent size of the traffic lane. A small car close to the camera can blot out more of the entrance than a larger vehicle in a distant lane. If every passing roof cuts through your chosen pedestrian, you could spend the evening waiting for timing to solve a problem caused by viewpoint. Move along your pavement until the part of the traffic lane you want sits to one side of the doorway. Alternatively, let the vehicle enter the very bottom of the frame, where only its roof or lights establish the presence of the road.
Work with the nose, the whole car, or the space it leaves
Try a sequence that treats the same passage as three different pictures. Capture the vehicle as its nose enters the composition. Capture it again when its full length is visible. Make one more picture just after it clears the hotel. The first frame tends to feel unfinished in an interesting way when the approaching vehicle points toward your subject. It feels accidental if only a bright, unrecognizable sliver breaks an otherwise tidy border. The second shows a specific car and invites the viewer to inspect it. That can be a good account of Vice City street life, provided the hotel remains easy to find afterward. The third might be your best hotel picture, particularly if the passing vehicle has just revealed a person beyond it. Judge the three together. Asking whether the car should appear at all is easier once you have seen how much energy the empty space retains after the car has gone.
Use color to connect events across the street
Look for a small echo between the vehicle and the building. A warm patch on a car roof may pick up a color already present near the hotel. A pale vehicle can repeat the value of a strip of pavement and carry the eye across the foreground. A vivid car against a much quieter building will probably become the main subject the instant it enters. If you like that effect, save the frame and see whether your attention ever travels from the car to the sign. One way to help it along is to time the picture so the nose points into the composition. Another is to leave a clear gap between the vehicle and the entrance, giving the viewer somewhere to go after looking at the paintwork. Avoid relying on a particular model spawning or a certain color coming back around the block. You are looking for a relationship between whatever appears and the colors you already have. Sometimes a dull gray roof does that work beautifully.
8. Adapt the composition to wet pavement or a dry night
When the street has a sheen, start by finding out which bright object produces which patch of color. Move a little way sideways while watching the lower part of the image. A pale streak that seemed to sit directly below the Ocean View name may line up more convincingly with a lamp or a neighboring window once you shift your angle. This matters because a strong reflection can become a second subject. If its apparent source is outside the frame, a viewer might spend their first few seconds wondering where the light came from. Try one version with both source and reflection visible, then another with only the strongest area of reflected color below the hotel. The first makes the scene easy to understand. The second can make the street feel larger, particularly when a ribbon of color stretches toward the bottom edge. Pick the version that still gives the hotel entrance a recognizable place in the scene.
Leave room for a reflection only if it has a shape
The temptation on a wet street is to tilt down until every attractive patch of color fits. Check what happens to the hotel while you do that. If the upper letters are disappearing through the top edge, the composition is now asking you to choose between a picture of the name and a picture of light on the road. You can often keep both by moving farther away and accepting a smaller hotel in the frame. Before making the move, inspect the reflection itself. Is there a clear stretch of color with a beginning and an end? Does a tire, road marking, or break in the surface give it structure? A large area of vague brightness may be doing less for you than the small strip of curb you already had. Try cropping the reflection mentally at its strongest change in color. If the shorter patch is just as expressive, keep the camera high enough to give your original subject the room it needs.
Build an equally deliberate foreground on dry asphalt
A dry street gives you quieter material to work with. Look for the edge of a shadow, a painted line, the repeating joints of a pavement, or simply the boundary between light concrete and dark asphalt. Use one of those features to connect the lower edge of the picture to the entrance. A clean wedge of empty roadway can make one moving figure look more solitary than a road full of spectacular reflections. Make two dry-street versions. In one, let the dark surface occupy enough room to create that sense of distance. In the other, trim most of it away and allow the building to dominate. Compare the size of the person in relation to the empty area. If the figure seems lost, move closer or wait until someone passes nearer to the camera. If the figure feels crowded against a noisy façade, keep the larger dark area. The weather has given you a choice about space and contrast, even on a night when the surface returns almost no color.
9. Make a clean final capture and two useful alternatives
Before the last pass, review what the game itself is putting in the frame. Look for navigation graphics, notifications, prompts, or your character's body occupying part of the composition. Decide whether those elements belong in the finished article image. A gameplay illustration can benefit from showing the player's position. A street photograph generally reads more clearly when a corner map or prompt has gone. Use the display options available on your setup, wait for a temporary message to clear, or compose with enough spare room for a modest crop afterward. If your character is visible, try positioning them at one edge and looking past their shoulder. That makes the viewpoint feel inhabited and can solve a foreground problem quite neatly. Take one test screenshot and open the actual saved image. Gameplay can look orderly while you are watching movement, yet a static picture turns every little icon and stray shape into a permanent part of the scene.
Change one thing on each alternate take
Take the picture you have been preparing, then give yourself two purposeful departures from it. For the first, keep the camera exactly where it is and change the moment. If your main frame has a walker at the door, let the next person pass beyond it or allow the street to empty. For the second, keep the intention of the original moment but change position by a small, recognizable amount. You might take two steps toward the end of the block so the sign clears an intervening pole, or move closer to reduce the width of the road. Look at the results immediately if the light is changing slowly enough. Because you changed a single element at a time, you can explain a preference. The timing version might have a clearer stride, while the position version might give the hotel a more convincing entrance. If both changes improve the photograph and conditions allow, combine them in a final capture.
Check the image at the size a reader will see
Open the saved screenshot at something close to the width of a blog post and then reduce it to the size of a thumbnail. The big view will tell you if the hotel name is intact and whether you caught a distracting overlay. The small view tells you about hierarchy. Can you pick out the building immediately? Is there a person-sized shape near it, or has the subject dissolved into a band of dark windows? If a car becomes the only recognizable object at thumbnail size, decide whether the picture should accompany an article about that car. If it is going at the top of a hotel photography guide, try an earlier capture in which the car occupies less space. Leave a little room around the sign when a publishing layout might crop the image for different screens. Save your original framing as well. A wide composition that works at the top of a desktop article deserves to survive a later experiment with a tighter crop.
- Check the hotel name and the four picture edges at full size.
- Check the entrance and the moving subject at reading size.
- Check which shape catches your eye first at thumbnail size.
10. Choose the photograph that brings you back to Ocean Beach
Lay out the descriptive scout frame, your main evening frame, and the two alternatives in the order you took them. Begin with the scout. It tells you which features belong to this building even when the light and traffic change. Next look at the evening images without zooming in. Pick the one that gives you the clearest sense of where you stood. You might remember a patch of open pavement you waited for someone to cross, or the particular angle at which the curb led toward the name. A photograph that brings back that physical position usually contains a useful relationship between near and far. Now put your preferred image next to the strongest alternative and read your original one-sentence brief again. Does the person appear to be arriving, leaving, waiting, or simply passing through? Several interpretations can work. Choose the frame whose visible details give a reader the best chance of reaching the interpretation that sent you out with the camera.
Make the final choice with a pair of close examples
Imagine that your last two pictures both have a legible sign, a recognizable façade, and a single person. In the first, the walker is centered exactly beneath the name, but their shoes disappear against a passing car. In the second, the walker is off to the side, stepping onto a pale patch of pavement with the doorway still ahead. For the arrival brief, the second picture has a stronger verb. The viewer can see the step and imagine the next one. For an architectural feature about the hotel's frontage, you might choose the first because its central alignment makes the sign and figure easy to compare for scale. Give your own two finalists this kind of specific reading. If you can only say that one is prettier, look for what produced that impression. Perhaps the warm light ends just above the person's head, or a clear margin of sky lets the roof stand out. Identifying that detail tells you what to preserve if you crop the image later.
Conclusion
Finish by writing a caption that a reader could verify from the picture. “A pedestrian passes the Ocean View Hotel as its sign lights up the frontage in GTA VI” works for an image that actually shows those things. If your winning frame contains an empty street, give the empty street its due. A sentence about the dark stretch of road between the viewer and the glowing entrance can direct attention to the choice you made on the pavement hours earlier in game time. Keep the original scout alongside the final photograph for yourself. Look at the pair and find the smallest change that made the biggest difference. It could be a single pace sideways, a few moments of fading daylight, or the gap that opened between a person's head and a bright letter. That is the detail worth remembering on your next visit to Vice City. You will know exactly where to stand, what to watch, and when the hotel has given you a different picture.